Thursday, October 25, 2012

Weekly Beauty Tip # 15: Ways to combat oily skin

I know a lot of people that have problems with oily skin. It can be an annoying problem, but fear not there are ways to fix that.

Ways to combat oily skin:

- Using blotting paper
- Washing your face every single day
- Using an oil minimizing toner after washing your face
- Using a mattifying powder
- Using an oil control setting spray


One of the biggest things you can do is cleansing your face and then following that with an oil minimizing toner. If you do this every day, you will see an improvement in the oiliness of your skin. The next thing to do would be getting blotting paper and using that before you apply your makeup. They are very easy to use, fairly inexpensive and easy to find.

Blotting Paper
Nyx (in the example above) makes blotting paper, as well as E.L.F (their's is called shine eraser) and many other cosmetic brands. You can also try a product like Nyx's shine killer before applying makeup.


SHINE KILLER  

Another big thing you can do is a translucent mattifying powder over your makeup. It will set your face as well as minimize oil and shine. There are many brands that offer this product as well. Hard Candy and E.L.F make cheaper alternatives with Hard Candy's Welcome Matte and E.L.F's Translucent Mattifying Powder

Hard Candy Welcome Matte Mattifying Transluscent Powder


translucent   

For those who like to use higher end products, Urban Decay makes a very highly rated version called De-Slick Mattifying Powder.


One last thing I suggest doing is to use an oil controlling setting spray like Urban Decay's De-Slick Oil Control Makeup Setting Spray.


Thursday, October 18, 2012

Weekly Beauty Tip #14: Use a setting spray

If you are finding that your makeup is still wearing off even when you use a face primer, use a setting spray. Setting spray is like hairspray, but for your face.

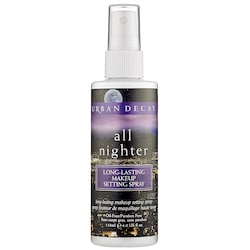
There are two setting sprays I would recommend using. The first would be the very popular and much raved about All Nighter Long-Lasting Makeup Setting Spray by Urban Decay.


Urban Decay - All Nighter Long-Lasting Makeup Setting Spray
This spray is raved about by everyone from beauty bloggers to top makeup artist. If you want your makeup to last as long as 16 hours, this is your setting spray. If you have problems with your makeup melting by the end of the day, this is your setting spray.  You can get this product from Sephora, Sephora.com or by purchasing it from Urban Decay's own website at www.urbandecay.com

The next setting spray I would recommend getting is E.L.F's Studio Makeup Mist and Set.


This is a cheaper alternative to Urban Decay's setting spray. I have never tried  All Nighter (although I plan to someday so I can do a comparison), but I do own this setting spray. This is a good setting spray, I would recommend it for those that are on a tight budget and can't afford to buy All Nighter. When I wear this my makeup lasts me all day. You can purchase it from E.LF's website (I am always talking about E.L.F's products, for those of you who still do not know the website it is www.eyeslipsface.com).

Monday, October 15, 2012

Nyx Soft Matte Lip Cream Review

This is a product that I've been meaning to post a review of for a while. I wanted to wait until I was able to  write a good quality review with pictures and swatches. Here is that review.

The description of the Soft Matte Lip Cream on Nyx's website is:

Neither lipstick nor lip gloss—this is matte lip cream. A new kind of pout paint that goes on silky smooth and sets to a matte finish. Soft Matte Lip Cream is surprisingly durable and, unlike some matte lipstick formulas, also moisturizing. Available in 11 lip colors.

I own two of these in the shades Tokyo and Addis Ababa. I love the names of each of these shades, they are all named after cities.

Packaging:


  I love the packaging of this product. It is cute and it is classy. It is small enough where you can quickly shove it in a purse or your pocket when in a rush.

Application, formula and wear:

This product has a doe foot applicator, which is great when on the go or when you don't have the time to put on a product with a lip brush. Putting this product on is great. It goes on feeling like silk, and as the name suggests it is very soft. I love using this product when I don't feel like wearing much makeup. It feels very light, when wearing it I often forget that I'm wearing anything on my lips. I should also comment on the smell of this. I absolutely love the smell of this product! It smells like vanilla cupcakes. It is completely different from the cherry-sweet like scent of Nyx's Mega Shine Lip Glosses ( another review for another day).

 These lip creams are also very pigmented, they have the pigmentation of a lipstick without the heaviness.They hold up better than many lipsticks do, I can usually go a whole day without reapplying (depending on what/when I eat or drink). They are very long wearing.

The only cons I do have are sometimes this product can be drying (that normally doesn't bother me) so you need to put on a layer of lip balm before applying. It also tends to settle into the cracks of your lips, but what lipstick-like product doesn't?

Swatches


Here is what the colors look like on my lips:


Tokyo


In real life Tokyo is just a little bit pinker, it is the perfect pinky-nude shade for me. It is a beautiful light pink shade that can be worn every day, it is perfect for when you want a toned down lip with a bold eye.


Addis Ababa


This color looks way different in real life. For some reason my camera decided to tone down the color. The color is a beautiful bright fuchsia barbie pink. It is great if you want a bold lip and don't feel like wearing a lipstick.

Hand swatches:

I took these while the swatches were still wet (hence the shine in the picture). Tokyo is on the left while Addis Ababa is on the right.

Over all:

 I love this product. It is unlike anything else I have ever used. It is very easy to use and I love how pigmented each shade is. I am definitely planning on getting more colors (I have been eyeing Antwerp for a while now). If you have been debating on buying these, buy them! You will not regret it, they will easily become one of your favorite lip products like they are one of mine. This is a product that I have used on clients for prom and more theatrical makeup looks. I would love to get more to add to my pro kit.


Reviews,reviews, reviews!

Hi, everyone! I am compiling a list of products that I own to review, so stay tuned for more product reviews!

Thursday, October 11, 2012

Halloween Nails: Blood drip

Blood drip nails! One of my more complex nail designs. I used china Glaze White on White as the base and use the red Migi nail art pen to add the blood drip. I started doing this design last year and it is my all time favorite Halloween nail design. I would wear it year round, but that would ruin it's specialness.

Weekly Beauty Tip #13: Unique and new lip color

Mix 2 or more lipsticks (or lipglosses) together for a new and unique lip color.

Thursday, October 4, 2012

Weekly Beauty Tip #12: DIY Pallet

Don't EVER put product onto your hand and transfer it to your face (like many people do with concealer), it is very unsanitary. Instead take an old DVD/CD, a blank CD/DVD or an old itunes card (or any type of gift card with a flat surface). Make sure you wash it well and use that as a pallet like an artist would use a paint pallet. For a DVD or a CD use the bottom of the disc, not the top.  It is a more sanitary method to putting on makeup and it keeps you from getting product all over you and making a mess.

I learned this tip when I was in cosmetology school where they said to use a DVD/CD. It works great, I use it every single time I do someone's makeup. Some of us (like myself with my personal train case) may not have enough room for a disc to fit in our makeup bags or train cases. This is where I recommend an itunes card. It works just as well (using the top of the card) and it is more compact. 

Monday, October 1, 2012

Halloween nails: Zombie

I normally don't post about nails and I do not do other people's nails (I can barely do my own!), but I did a really cool Halloween nail design that my assistant/test model insisted that I post.


This actually was not too difficult to do! I started with a base coat, then I painted my nails with Essie Mojito Madness,save the middle finger nail on my right hand (I always paint this differently). On that nail, I used a pink OPI nail polish, I don't know what it's called the bottle I used did not have a sticker stating the name.

Next I took my black Migi nail art pen (these are a lifesaver!) and drew on the stitches. Then on the pink nail, the brain lines. The hardest part of this was the brain nail. At the end I added a coat of clear top coat (a must for any manicure).

I got the idea for this nail design from a picture on google, I don't have the link but if the person who posted the picture finds this post, I will gladly give them credit.