Showing posts with label Blackheart. Show all posts

Friday, May 17, 2013

Nails by Vicky: Haul Post


A couple of days ago I went shopping with my best friend Heather, the owner of this blog. I wanted to make a post about the nail related products that I bought. As with any post that I make if you would like to see me use these products in a design, would like a review, or if you have a nail related question I would be happy to answer it!

Now onto the products I bought.


This is a Blackheart nail polish from Hot Topic. I have a couple other nail polishes from Hot Topic and they are actually very nice. I love the packaging too. It works with the Hot Topic brand. Unfortunately, this particular nail polish does not have a name on it and I bought it on clearance so Hot Topic does not carry it anymore. It is a pinkish glitter nail polish. Normally Blackheart nail polish costs $5.


Next is a Duo Nail Polish in White Lie. This was also a clearance product from Hot Topic and is also not carried anymore. It is a combination glittery orange polish and a white nail polish. I really like these duos because it gives you two different shades in one. This normally sells for $6.99.


I am really excited to try this next product out because I have heard very good things about the Essie line. I got the color Good as Gold which is a shimmery gold color. I had been looking for a gold color for my nail polish collection and this polish was the perfect color to add to the collection. I bought this polish at a Beauty Supply store near me but Essie polish normally sells for $8.


Another nail polish brand that I have been wanting to try is Zoya. I am so excited to be able to try out the Zoya Pixie Dust polish in Chyna. It is a nice ruby red color. I also bought this polish at a Beauty Supply store but Zoya polish normally sells for $9.


The last product I bought was from Sephora and is called a nail protector. This product helps keep you from accidentally painting your skin along with your nails. If you follow my posts you will know that I am not the cleanest painter in the world, so I am hoping that this product will help me.

That is everything! Please let me know if there is anything that you would like me to review or make a post about. 

Monday, February 11, 2013

Nails by Vicky: Valentine's Day Nails-Tutorial


For this tutorial I will be describing how to paint polka-dot Valentine's Day nails!

What you will need:

  • Whatever base coat you use
  • A white nail polish
  • At least three different nail polishes in red or pink
  • A dotting tool (pictures shown later in tutorial)
  • Whatever top coat that you prefer to use
1. First, you want to apply one coat of the base coat. This helps the nail polish adhere better to the nail as well as make a nice even surface so that the nail polish does not show any ridges or bumps.

I use Revlon Quick Dry Base Coat ($6 at drugstores) because it does not take forever to dry which allows me to get started on painting my nails earlier.

2. Once the base coat is dry, apply the first of two coats of white nail polish that you have. Wait until they dry completely.

I am using Hot Topic's Blackheart Beauty polish in white ($5 at Hot Topic).


(Sorry about how messy the nail polish is but I am kind of a messy painter when it comes to my nails. If you are too, don't worry, it comes off easily with nail polish remover, then it looks like a professional has done them!)

3. Now that the two coats of nail polish are dry, use a dotting tool that is of good size to make the dots. To do this, place a large amount of polish on a piece of paper or a paper plate. Then dip the end of the dotting tool that you would like to use and simply dot onto your nail. You can do this in a random pattern (like me) or you can plan exactly where you would like each color.

For the dotting tool, I am using a set from a beauty supply store for $8. If you cannot find them in a store or cannot go to a store, you can easily find this set on amazon.com.


The one I am using is the purple one, more specifically the larger side of the tool.

For this step I am also using the following red and pink nail polishes:

Red Hot ($2 from ELF)


Fab Fuchsia ($2 from ELF)


Light Red ($2 from ELF)


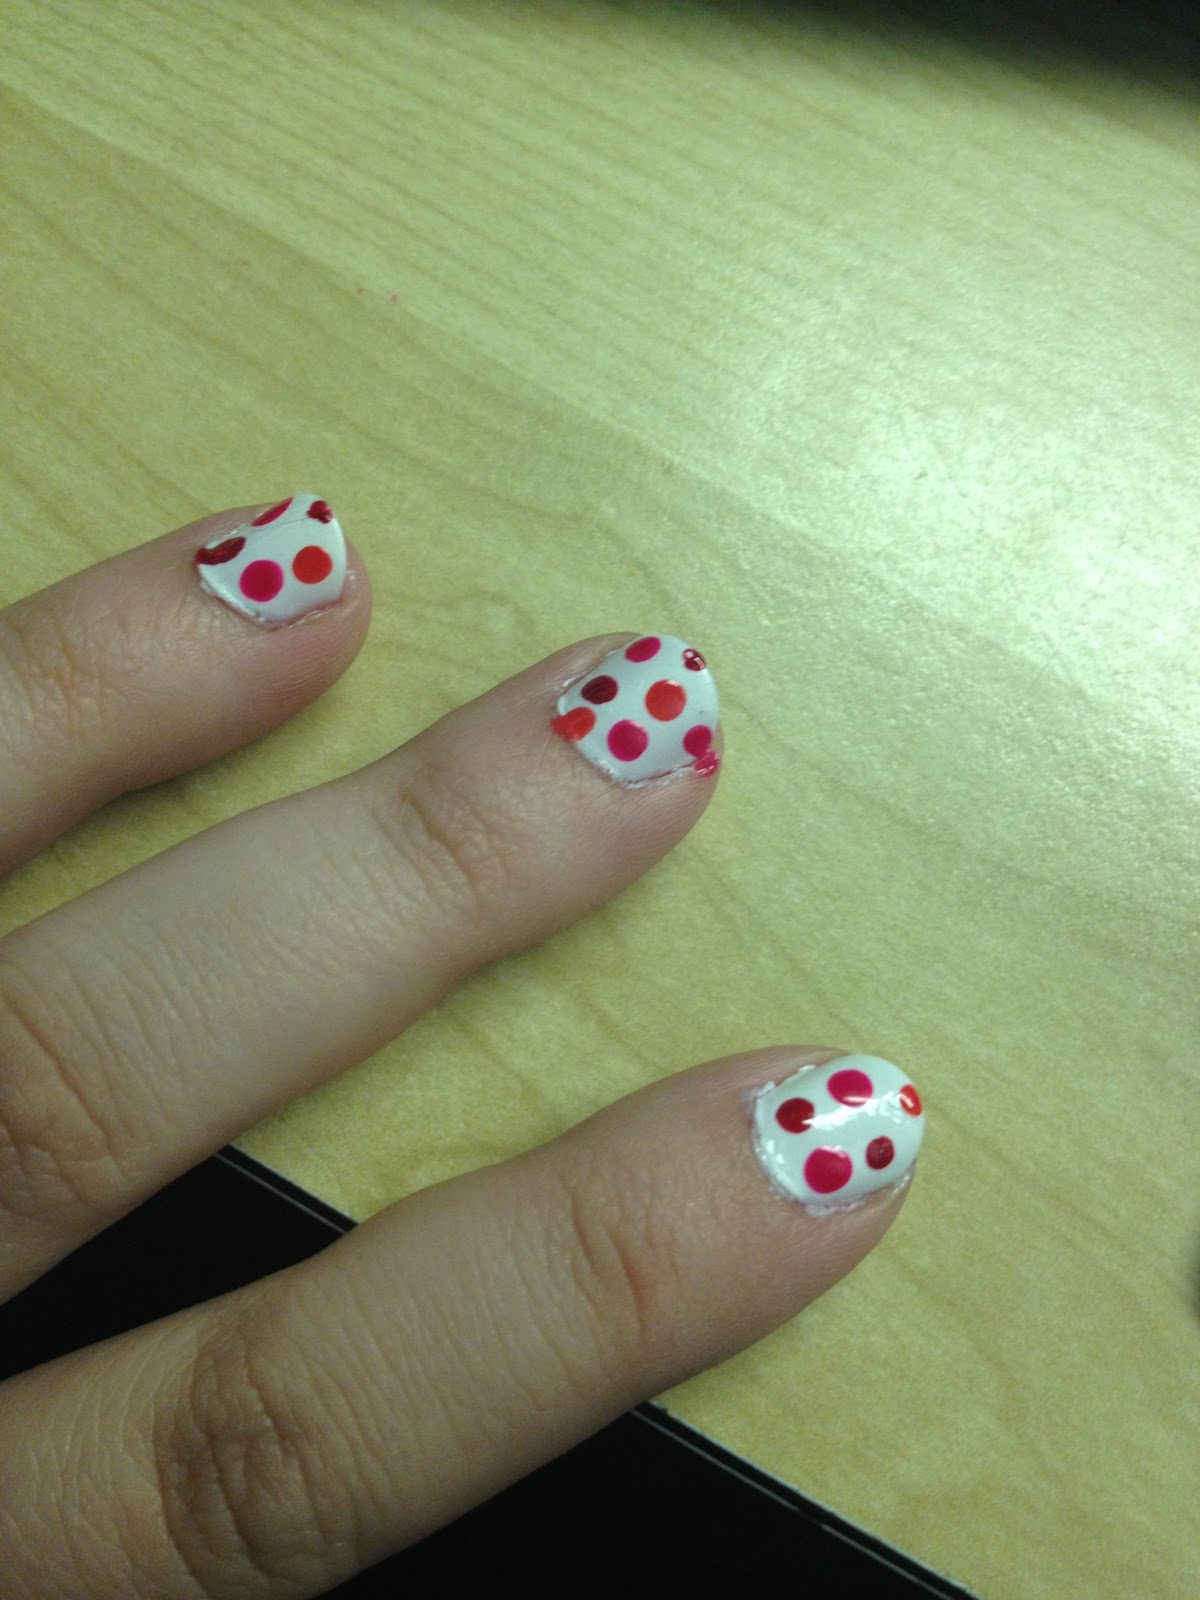
Once you are finished dotting your nails they should look somewhat like this:


4. The last step is to apply the top coat once the dots are dry.

The top coat that I am using is called Out the Door ($5 from beauty supply stores). It dries very fast and has a very nice shine. TIP: If you would like your nails to stay longer, the next day paint another coat of the top coat and paint the tip of your nail.


Below is a picture of the final outcome!


(Unfortunately, my dots ran a little bit when I put on the top coat and this was because I underestimated the drying time. So a lesson to be learned is: wait a while before applying your top coat!)


------------------------------------------------------------------------------------------------------------

I really enjoyed making this tutorial for everyone and I hope you all like it! If you would like me to do a tutorial for a specific kind of nail or have a question about nails, please feel free to leave a comment.  I would be more than happy to answer any and all questions!

For the latest news on what nails I may be doing next or if you just want to see what I am up to as a crazy college student follow me on


My personal Tumblr: http://apolloodair.tumblr.com/