Monday, December 31, 2012

Review: Not Your Mother's Beach Babe Texturizing Sea Salt Spray

 Happy New Year!! I hope everyone has a very happy and safe new year!


This is a product I have had for a few months now and I've been waiting for the right time to review it. Finally, I have a chance to.

Not your mother's is a great brand with a very wide range of products. All of their products are very cheap and affordable but great quality.  You can buy their products at a drugstore for about $5. Ulta also carries them. I love the names of their products, they are all very clever. I found them while browsing the internet for hair products one day.

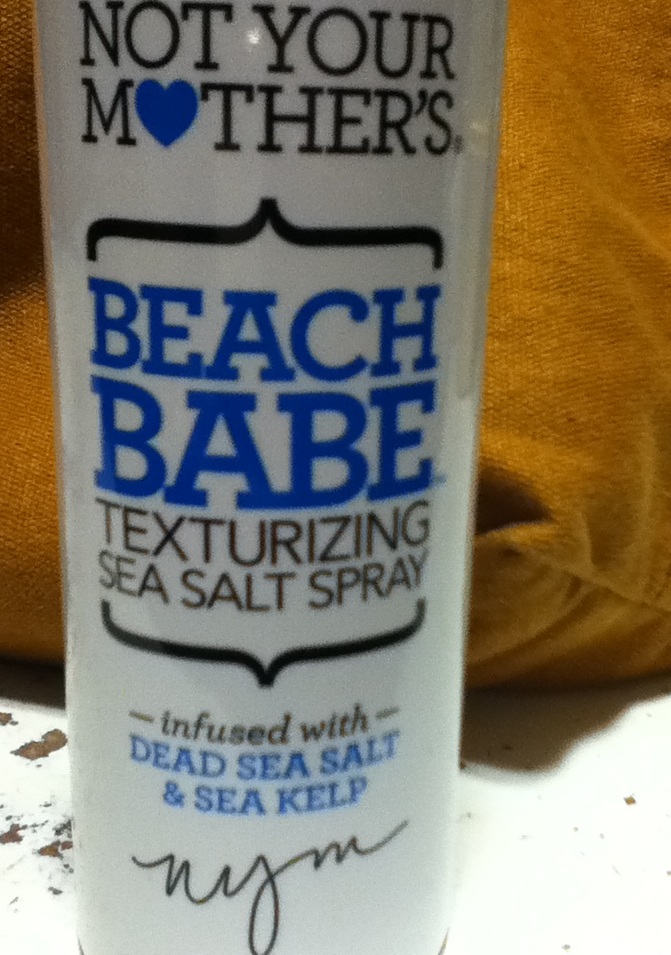
I had been looking at Beach Babe for a while until I was finally able to buy it at my local Wal Mart. I had been looking for something to transform my normally straight hair into nice waves. Now what is Beach Babe? It is a texturizing spray meant to give you beach waves. The description from Not Your Mother's on the bottle claims:

Not everyday can be a day at the beach...minus the sunburn. Beach Babe has everyone fooled into thinking you just left the beach (you little liar!). It adds sexy, tousled waves and a lite matte finish to any hair type. Infused with natural dead sea salt & sea kelp this salon formula has you and your hair on the boardwalk all year long.


Beach Babe comes in this little plastic bottle with a trigger handle. I really like this, it's very easy to control how much product you want to use. There is also a really good amount of product in this bottle.  I love the packaging of the bottle, it's feminine and very cute.


There is a little tab that you can tap to open or close this. I would still be careful when traveling with it though, in case that tab moves. You don't want hair product to leak all over inside of your bag!


This is a very easy product to use. Just spray it liberally all over your hair, where ever you want beach waves. After spraying it on, I just bunch up all of my hair and clip it into place with a claw clip then let it air dry. That isn't the only way to do it, that's just what I  like to do. You can also just scrunch your hair with your fingers. Instead of letting it air dry you can also blow dry it.

Yes, this product does work! After my hair has dried, I release it from the clip and I always have beautiful, tousled beach waves. It is such a great product if you want to style your hair and you don't have the time to use a curling iron or a straightener. The application directions on the bottle claim you can use this on wet or dry hair. I have used it on both, I find that it works better on dry hair. The only problem I have with this product is for my hair, the waves don't last. My hair doesn't hold a curl well unless I use a good amount of mousse and hairspray. I'm sure it holds perfectly well with anyone else's hair, mine just likes to be difficult.

I also have to mention the smell! It has such a great tropical smell. There have been times where I've used this product just because I wanted to smell it!

If you've been thinking of trying this or any other Not Your Mother's products, just do it. Their products are great, and if you don't like it you are only losing about $5. If you would like to see what products they have, visit their website: http://www.nymbrands.com . I  really want to try their Girl Powder Volumizing Hair Powder.


Friday, December 28, 2012

Weekly Beauty Tip #24: Washing makeup brushes

Many people are unsure of what to wash their makeup brushes with. You don't need a fancy brush cleaner, just use baby shampoo! It cleans well and it is gentle on your brushes.

Note that it is very important to wash your makeup brushes about once a week depending on how much you use them. You can get breakouts from a dirty, caked makeup brush.

Friday, December 21, 2012

Weekly Beauty Tip #23: Removing stubborn nail polish

To remove stubborn nail polish, soak enough cotton balls for each nail with nail polish remover. Place one cotton ball on top of each nail and completely cover the tops of your fingers, over the nails with tin foil. Keep this on for about 5-10 minutes.

Friday, December 14, 2012

Review: The Wet Brush

The Wet Brush is something I had been looking at for a long time and debating whether or not to buy. Finally, I gave in and got it.


I don't have my own picture of the product, I didn't save the packaging because I didn't think I would be reviewing it and I don't want to post a picture of the brush covered in hair (that would be gross).

This brush is a miracle worker. I have a lot of hair, and my hair is very long. It is always getting tangled and it's always hard to brush when wet. I can tell you that I will never have this problem again! The Wet Blush literally glides through wet hair, never gets hung up and really does brush out knots and tangles extremely well. This brush has very flexible bristles, where a normal brush has stiff bristles. That is the key to how this brush works.

I have not had a single problem since I got this brush, I have not had any tangle that I could not brush out. It works on every hair type and texture. Even though this was made to use in wet hair you can use it in dry too. The brush comes in a lot of colors, which is great too. My only complaint is that the handle of the brush seems like it could be broken easily if you aren't too careful.

Every woman and girl should have one of these brushes, especially if you have long hair like I do. It is inexpensive, I only payed about $7 on amazon for it. Keep in mind that amazon's prices do change a lot, so you may get a higher or lower price than I did. 

Weekly Beauty Tip #22: Airbrushed looking foundation

To get an airbrushed look to your foundation, use a stipple brush or sponge with a liquid foundation. Apply the foundation using the brush/sponge with the stippling method.

The only way I apply my foundation is with a stipple brush. I used to use cosmetic wedges, but those went bye bye as soon as I got a stipple brush. I love how my foundation looks when I use a stipple brush, it looks airbrushed and flawless. My stippling brush is one of my favorite brushes.

The most important thing to have with stippling other than foundation is a stippling brush or sponge.  You need to have one of these in order to stipple correctly. I recommend using ELF's Studio Stippling brush


or the Beauty Blender stippling sponge


If you don't want to shell out the money to get the Beauty Blender, there are dupes available.

Once you have the right tools you need your foundation. A liquid foundation will work best. Put the liquid foundation onto a palette (a pallet like a painter's pallet not like an eyeshadow pallet, I recommend using the shiny side of a CD or an itunes card. Make sure they are both very clean before using) then dip your sponge or brush into it.

Next comes the actual stippling. The stippling method is very easy, though it may sound confusing when explained. Simply take your stippling brush/sponge with the foundation on it and bounce it up and down all over your face. You can do it as many times as you like to get preferred coverage. This method will also help you apply your foundation evenly.

Lastly, after stippling you can buff the brush or sponge around your face in a circular motion to help blend it all in.

I recommend using a setting powder when you are finished, I always set my foundation. I recommend using a translucent powder such as Elf's High Definition powder
 High Definition Powder - Translucent


or Makeup For Ever's HD Microfinish Powder.


MAKE UP FOR EVER - HD Microfinish Powder


Friday, December 7, 2012

Review: Lime Crime lipsticks

Finally, here it is! My review of Lime Crime's lipsticks! This will be a review of the product only and not about any of the controversy with this company. I don't care about any of the controversy, I only care how the product preforms, which is the most important thing.

I should have said this in previous posts, I am still learning how to take good pictures of swatches, products and packaging. I am also not able to use my really good camera at this time so my pictures aren't the best. Please be forgiving, I haven't been doing reviews with swatches and such for all that long.


I own 3 Lime Crime lipsticks in Retrofuturist, Centrifuchsia, and Poisonberry.


Lime Crime lipsticks come in this box:

I love these boxes, they are so girly and cute. I also love how you can put 2 of the boxes together and get this:

The lipsticks themselves of course match the boxes.

I love, love, love the packaging of these. The lipsticks come in a purple tube with Lime Crime and a holographic unicorn. Some people would probably be embarrassed to be seen with makeup packaging that looks like this, but this just screams me.

The names of each color are at the bottom.

For a size comparison, here is a Lime Crime lipstick tube next to a MAC lipstick tube.

Here is Retrofuturist. My camera gave this color an orange undertone, but this is a bright and true red.

This is my favorite lipstick ever.

Here is Poisonberry. Don't let the color in the tube deceive you. When applied, Poisonberry is a beautiful and flattering berry color. It is very buildable so you could probably build up the color to get a deep purple.

Here is Centrifuchsia, a deep pink/fuchsia color.

I don't have lip swatches for these today, I will probably post some lip swatches of these as I wear them more. For now here are some hand swatches.


Top to bottom: Retrofuturist, Poisonberry and Centrifuchsia. Retrofuturist is a bright true red, not orangy. The Poisonberry swatch is pretty spot on and the Centrifuchsia looks a tad bit different.

I love these lipsticks. They are very creamy and pigmented. I am very impressed with the staying power, they last most of the day if not all day without reapplying. They also leave a stain behind which I love.

Top to bottom: Retrofuturist, Poisonberry and Centrifuchsia.

They smell like vanilla, but the smell isn't overpowering. As I mentioned with Poisonberry they are very buildable, which is nice when you want a subtle color. 

Lime Crime has so many different lipstick colors, many in colors that you won't normally find such as yellow and green. I do plan on getting another one of these as well as some other Lime Crime products. Lime Crime has a very good range of products which you can find at http://www.limecrimemakeup.com/ .

I own almost all of the Lime Crime nail polishes (I need 2 more!) I have not tried them yet, but once I try one there will be a review. I am dying to try the new Velvetines in Red Velvet as well. Hopefully soon or after the holidays I will be able to get one and have a review of it.


Weekly Beauty Tip #21: Make your own tinted moisturizer

Making your own tinted moisturizer is very easy and you can use products you already own. Simply mix your foundation with a moisturizer.